Documentation Index
Fetch the complete documentation index at: https://docs.plantpredict.com/llms.txt
Use this file to discover all available pages before exploring further.
The 3D Scene Overview page allows you to upload a 3D shade scene for advanced shading analysis. You can also create or update a scene from Map Builder without manually exporting and re-uploading a PVC. If no 3D scene is present, the prediction runs as a 2D prediction using the shading algorithm configured in each DC Field (unless legacy 3D shading is enabled at the DC Field level). When a 3D scene is loaded, you must run the 3D calculations on this page before running the main prediction.
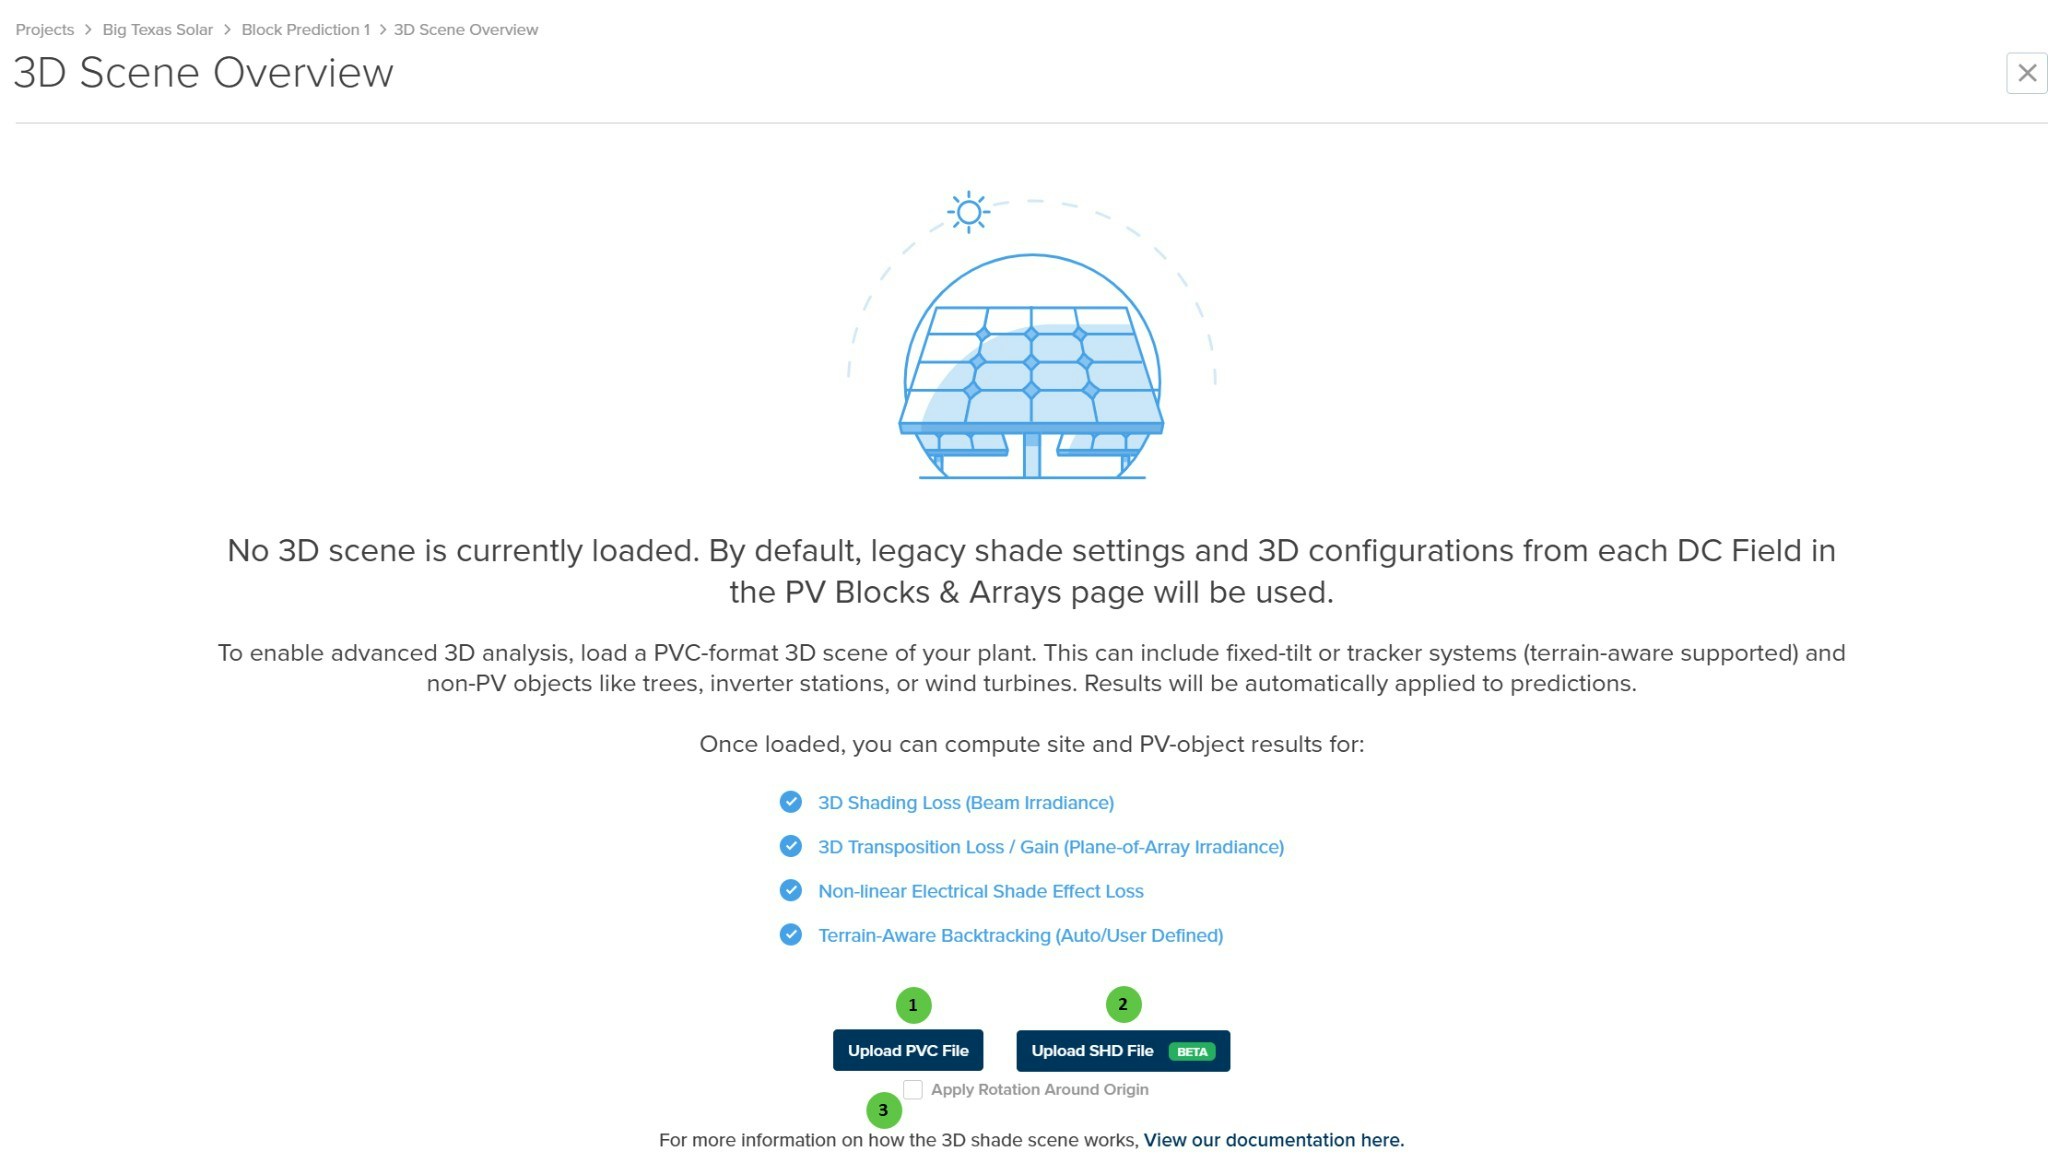
Initial State (No 3D Scene)
When you first open the 3D Scene page, you are presented with upload options. The page explains the capabilities that become available once a 3D scene is loaded, including beam shading loss, transposition effects, non-linear electrical shade effects, and terrain-aware backtracking.
| # | Input | Type | Units | Description | Related Documentation |
|---|
| 1 | Upload PVC File | Button | — | Upload a 3D shade scene in PVC format (version 1.4.1). This is the native PlantPredict 3D scene format exported from the Advanced 3D Design editor or external CAD tools. | 3D Shading |
| 2 | Upload SHD File | Button | — | Upload a 3D shade scene in SHD format (PVsyst format). This option is currently in Beta and allows import of shade scenes created in PVsyst for cross-platform analysis. | — |
| 3 | Apply Rotation Around Origin | Checkbox | — | When enabled, applies a rotation transformation to the imported scene around the origin point. Useful for aligning imported scenes with the correct site orientation. | — |
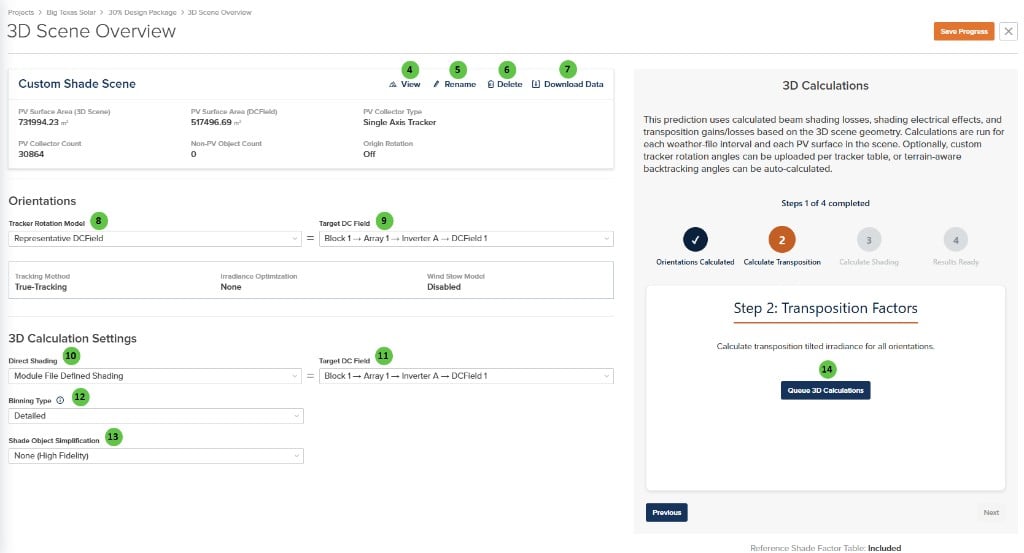
3D Scene Loaded
Once a 3D scene has been uploaded, the page displays scene summary information (PV Surface Area, PV Collector Count, Non-PV Object Count, etc.) and configuration options. Before running the 3D calculations, review the Orientations and 3D Calculation Settings.
| # | Input | Type | Units | Description | Related Documentation |
|---|
| 4 | View | Button | — | Opens the 3D scene viewer to visually inspect the uploaded scene, including PV surfaces, non-PV objects, and terrain. | — |
| 5 | Rename | Button | — | Opens a dialog to rename the uploaded 3D scene. | — |
| 6 | Delete | Button | — | Removes the uploaded 3D scene from the prediction. The prediction will revert to 2D analysis mode. | — |
| 7 | Download Data | Button | — | Downloads the current 3D scene as a PVC file, including any custom 3D objects that were added or edited in the 3D shade scene. | — |
| 8 | Tracker Rotation Model | Dropdown | — | Select how tracker orientations are calculated. Options: Representative DC Field, Time Series Schedule, Terrain-Aware Backtracking. | Terrain-Aware Backtracking |
| 9 | Target DC Field (Orientations) | Dropdown | — | Select which DC Field’s tracking parameters (method, optimization, wind stow) are used when Tracker Rotation Model is set to Representative DC Field. | — |
| 10 | Direct Shading | Dropdown | — | Select the direct shading calculation method. Options: Module File Defined Shading, None, Linear, Fractional Electrical Shading, Step Fractional Electrical Shading. | 3D Shading |
| 11 | Target DC Field (3D Calculation) | Dropdown | — | Select which DC Field’s configuration is used as the reference for 3D calculation settings. | — |
| 12 | Binning Type | Dropdown | — | Select the granularity of shade factor calculations. Detailed provides the highest accuracy with per-timestamp calculations. Balanced and Quick options use sun position binning and interpolation between sun positions to reduce calculations and speed processing time. Note: Export Shade Factor Table requires Detailed binning. | — |
| 13 | Shade Object Simplification | Dropdown | — | Select the level of geometric simplification for shade objects. None (High Fidelity) uses full object geometry. Bounding Box (Fast) reduces calculation time for scenes with complex 3D shade objects. | — |
| 14 | Queue 3D Calculations | Button | — | Initiates the 3D shading calculations. The process runs through four steps: Orientations Calculated, Calculate Transposition, Calculate Shading, and Results Ready. Progress is shown in the right panel. | — |
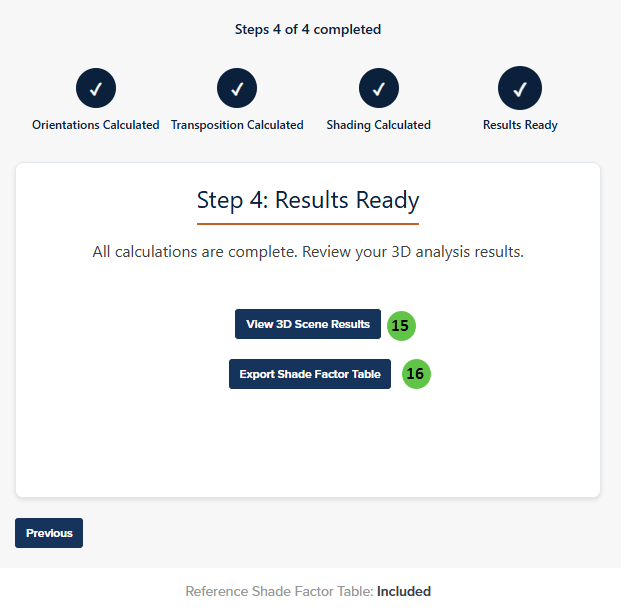
Results Ready
After the 3D calculations complete, all four steps show as completed and you can view results or export data.
| # | Input | Type | Units | Description | Related Documentation |
|---|
| 15 | View 3D Scene Results | Button | — | Opens the 3D Shade Scene viewer to visualize shading patterns, irradiance distribution, and other calculated metrics across the scene using heat maps. | 3D Shade Scene |
| 16 | Export Shade Factor Table | Button | — | Downloads a shade factor table for comparison with PVsyst results. Availability restrictions: For tracking systems, this option is only available when Tracker Rotation Model is set to Representative DC Field and both Irradiance Optimization and Wind Stow are disabled. For both tracking and fixed-tilt systems, Binning Type must be set to Detailed. | — |
Saving Changes
Click Save Progress in the top-right corner to save your 3D scene configuration and calculation results. Click the X button to close without saving.